
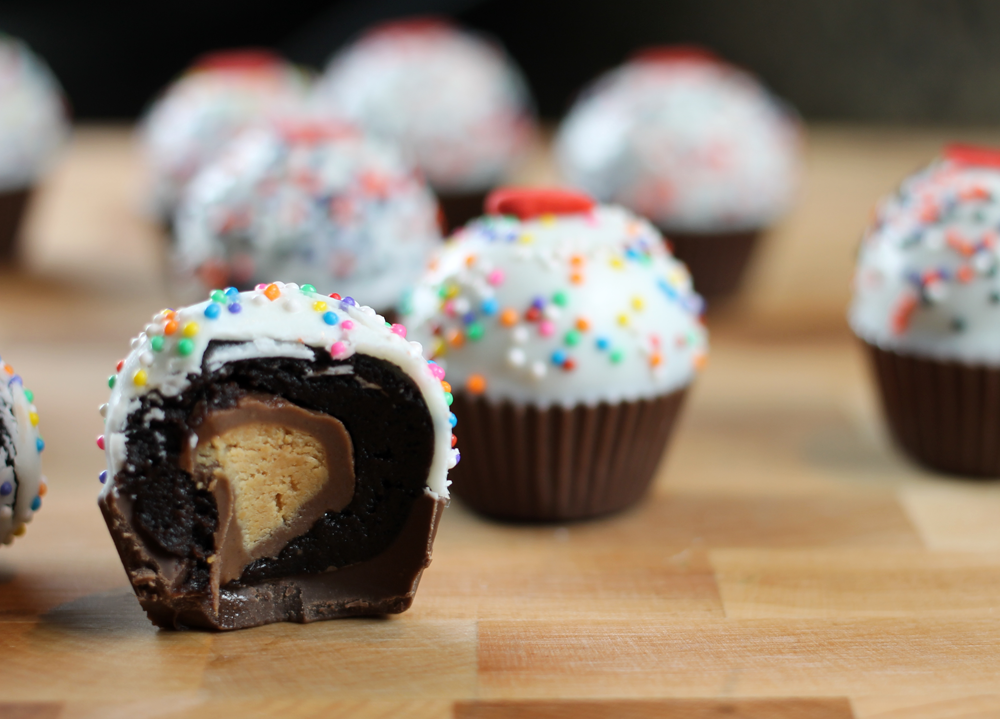

I’m terrible at keeping secrets, so here it goes: there is a Reese’s mini peanut butter cup in the center of each chocolate cupcake bite! Sound awesome? It is. I never thought cupcake bites needed improving on until now. The other day I happened upon a bag of Reese’s minis in the pantry that was sitting next to a box of chocolate cake mix and had a light bulb moment.

These are made nearly step for step like cupcake bites, with the little addition of a tasty peanut butter chocolate cup in the center.
If you haven’t made cupcake bites before, you start with crumbled cake. You can crumble the cake by hand or use a food processor (I used to do it by hand, but now use a mini food prep because it’s faster). The most important part is that are no clumps of cake in the end.

In a large bowl, the cake crumbles are mixed with 1/2 – 3/4 can of frosting and mixed until everything is thoroughly combined. When it comes to the amount of frosting to use, you want enough so the cake holds together and can be formed into balls and hold its shape, but not so much it’s too soft and mushy.


To get the right size cake ball, I use a handy dandy scooper that’s about 1-1/2 inches across. It’s the perfect size for the chocolate candy mold that’s used to form the cupcake bottom.

Drop a Reese’s mini in the scooper and fill the rest with the cake mixture. Then, using the palm of your hands, roll the cake into a ball around the Reese’s mini.

Repeat and repeat and repeat until you use up all the cake or Reese’s minis. My husband and I may have snagged a few pieces of candy here and there, so I made 4 1/2 dozen with Reese’s minis centers until we ran out of candy. I made 16 more cake only balls after that. Yes, it makes MANY!

Put all the rolled balls into the fridge for an hour (or even overnight) so they chill a bit and are slightly easier to handle. Alternately, toss them in a freezer for 10 minutes before the next step.

To make the chocolate bottom of the cupcake shape, start off by melting some chocolate candy coating (Log House CandiQuik is my go-to). Working one at a time, spoon some melted candy coating into the mold until it’s just over half way full. Then, drop one of the cake balls into the chocolate filled mold and press gently, just until the coating rises to the top of the mold.

I have a few of these chocolate candy mold trays so I can alternate them. I finish filling a tray, put it in the fridge to set the chocolate candy coating more quickly, and I work on filling another tray while the first is chilling.
When the candy coating is set, they easily pop right out of the mold.

To decorate the tops of the cupcakes, you need some more melted coating. I usually use Log Cabin CandiQuik for this part as well, but if you want a different color, Wilton Candy Melts also work. Dip the tops of the cupcake bites into the melted chocolate, making sure that the cake is completely covered in the coating, and gently shake off any excess coating you can. Sprinkle the tops of the cupcakes with any sprinkles (I think smaller sprinkles work better) and you’re done.

Now you have the most perfect bite-sized treat that will impress everyone. Seriously. Everyone you share these with will think you are just as amazing and magical as these cupcake bites are.


Did you use marshmallow fondants for the hearts?
Hi Brittany – the red hearts are actually jumbo sprinkles. Wilton makes them and they should be easy to find now, especially with Valentine’s Day coming up soon.