

I’ve been wanting desperately to try this cookie decorating technique. Could it be just as easy and awesome as the rest of the internet promised it would be?
Spoiler Alert: yes, it is just as easy and awesome as promised.
I first decided to go searching for a new CHOCOLATE cutout cookie recipe. I wanted a change from a regular sugar cookie, plus I thought a nice chocolate brown color would work well with the darker colors of icing I had in mind.

When rolling out chocolate cookie dough, using unsweetened cocoa in place of flour is a must. A sifter is also totally necessary to make sure any lumps (like in the picture above) are demolished. I’m usually lazy when it comes to sifting, but here it makes for some nice, light and fluffy cocoa powder to work with.


These chocolate cookies are delicious. Imagine what a brownie cookie would taste like and that’s pretty much what you have here.

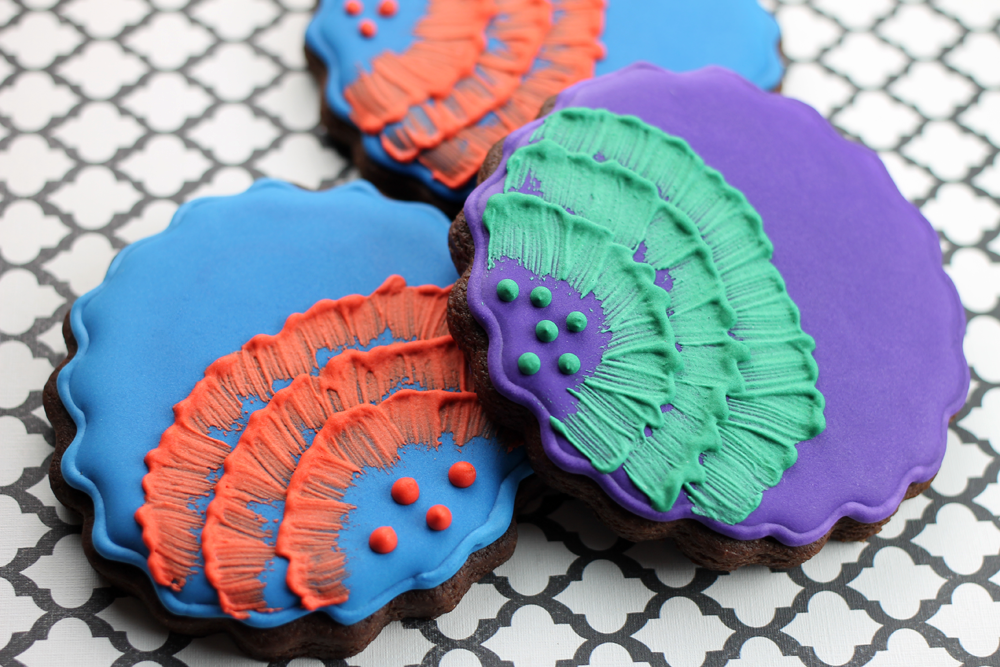
Once all of the cookies were baked and completely cooled, I outlined and filled them with royal icing. I wasn’t going for any theme in the colors I chose, yet ended up with regal purple and royal blue.

As always, the filled cookies are left to dry overnight.
Now, to release the inner artist and break out the paintbrushes.
Having never tried this decorating technique before, I first made two quick runs on wax paper. I liked that the bristle stroke was more pronounced with the slightly harder brush, so I chose that one.

And this is how it looks on a cookie…
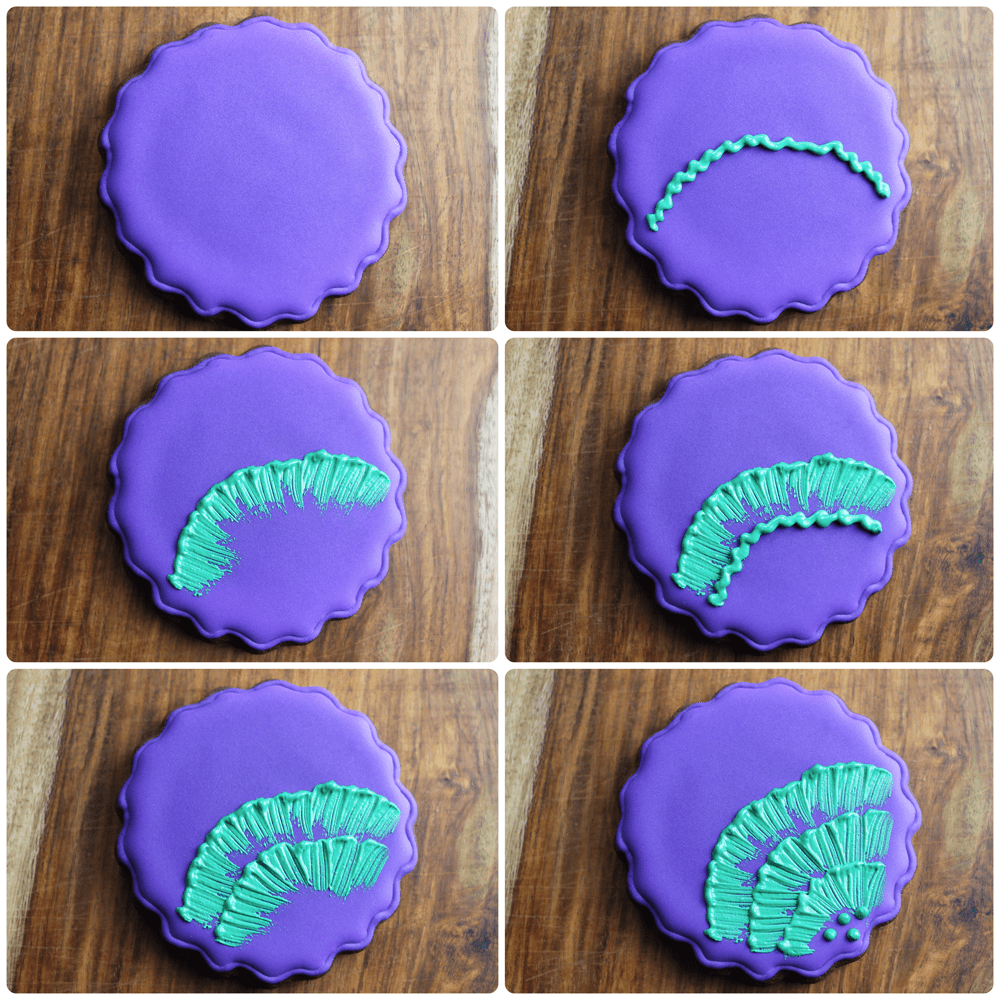
Pretty neat, huh? Here’s what you do:
1. Make a squiggly line with royal icing
2. Use a small paintbrush to drag some of the icing down
3. Clean the brush
4. Repeat

So many colors, so little time.


Chocolate Cutout Cookies
Adapted from this “Best Ever Chocolate Cutout Cookies” Recipe
Makes about 22 3-inch round cookies
1 1/2 cups all-purpose flour
3/4 cup unsweetened cocoa powder, plus more for rolling the dough
1 1/4 tsp baking powder
1/8 tsp salt
3/4 cup butter, softened
1 1/4 cups sugar
1 egg
In a medium bowl, sift the flour, unsweetened cocoa, baking powder and salt. (Ok, I really only sifted the cocoa powder.) In a separate large mixer bowl, cream the butter and sugar together until smooth and fluffy and then mix in the egg.
Stir in the sifted ingredients into the creamed butter and sugar and mix until everything is incorporated. The dough will be sticky. Scoop the sticky dough onto plastic wrap, flatten it into a disk shape, and refrigerate it from at least 2 hours to overnight.
Preheat the oven to 375 degrees. Sift unsweetened cocoa powder onto your work surface for rolling. When the dough comes out of the fridge, it might be too cold to roll. If it is, just kneed it for a few seconds to soften it up and get it into a good rolling texture.
Roll the dough out to 1/4 inch thickness and cut out your shapes. Sift more unsweetened cocoa powder onto your work surface or onto the surface of the dough as needed. Place the cookies onto a cookie sheet about an inch to two inches apart on your cookie sheet. Before baking, I recommend placing the cutout cookies in the freezer for 5-10 minutes. This helps the cookies keep their shape and size.
Bake for 8-10 minutes. Allow cookies to cool on the cookie sheet for 5 minutes before removing to a wire rack to cool completely.
Leave a Reply